
Since we host Easter Sunday at our house every year, I always try to add something with a little creative touch to the table or desserts. In past years I've mainly done cute cupcakes, such as bunnies or chicks. This year i decided on something that not only the kids would get a kick out of. This year I made "Netted Easter Egg Candy Treats."

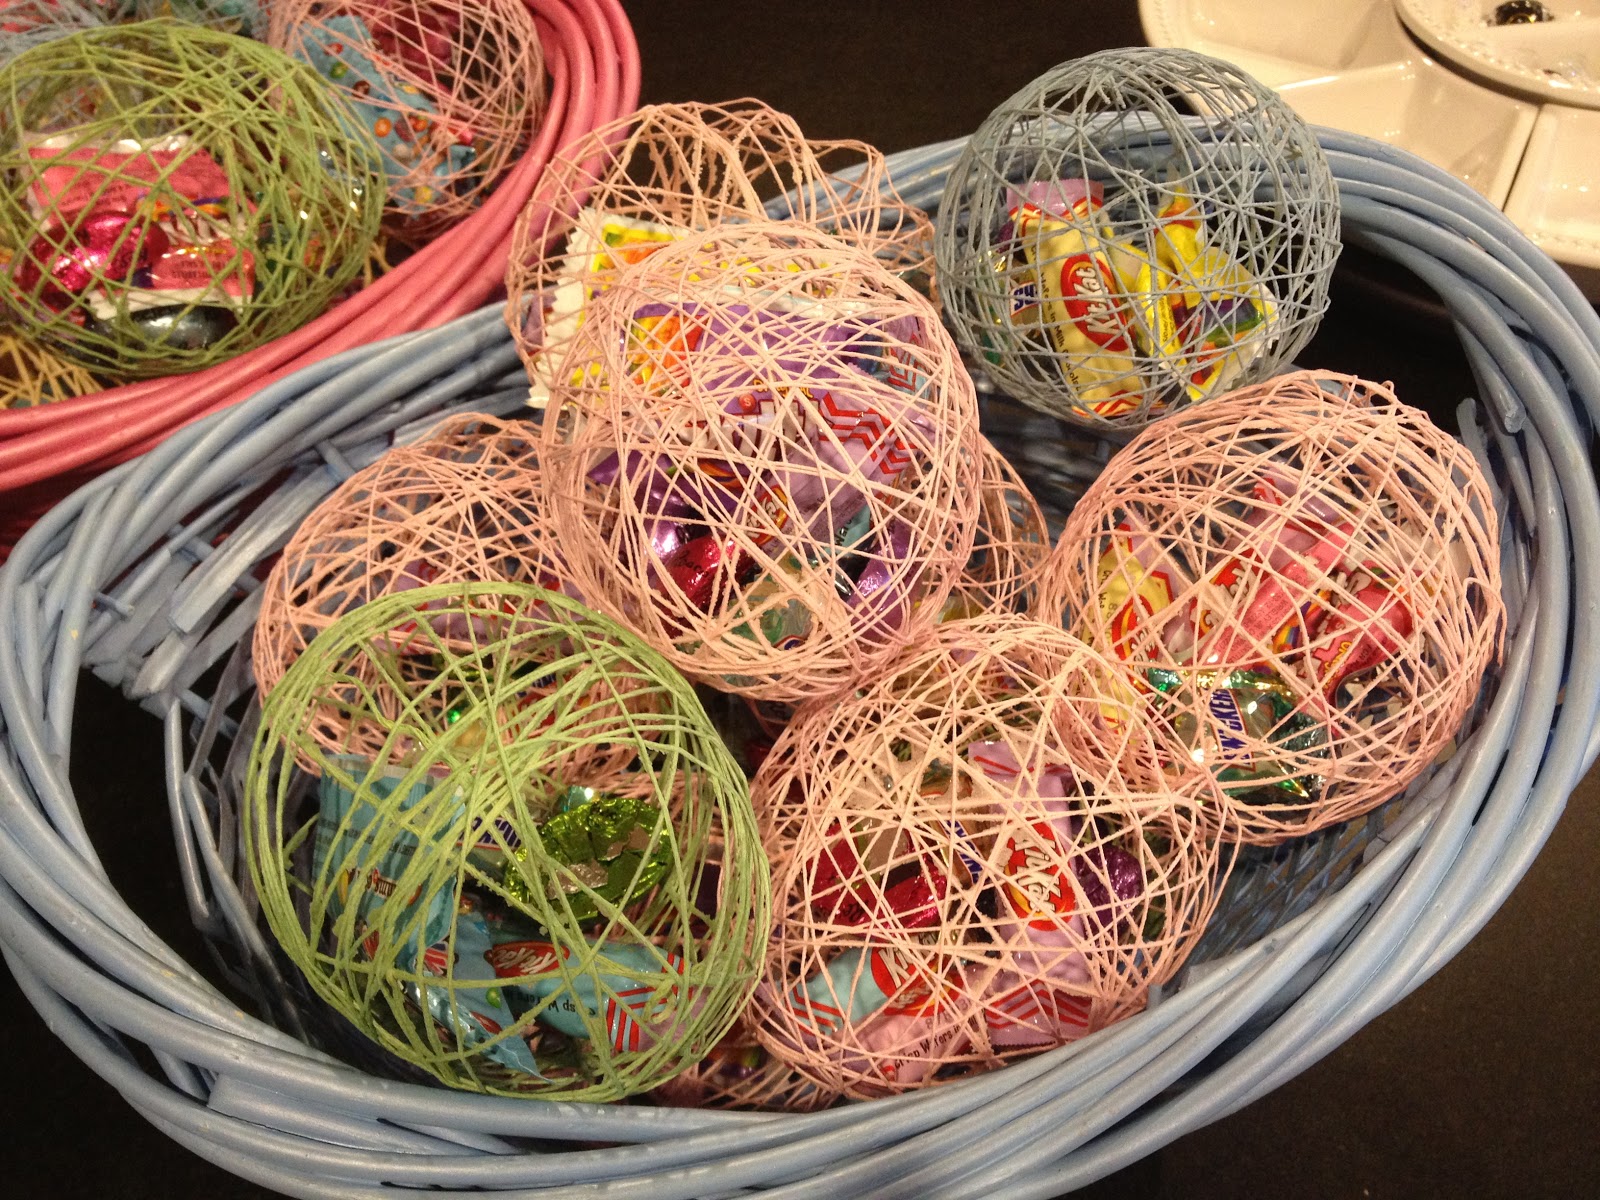
One netted egg gets placed at each table setting for Easter Sunday Dinner, such a cute and fun thing for everyone to wonder how the candy got in there and to get it out!!!
DIY How To:
WHAT YOU WILL NEED:
Water Balloons
(any color, they get popped)
Cotton String
(you can used white and add food dye to the mix or use regular friendship bracelet string)
Liquid Starch
(I got mine at Walmart (Sta-flo) for 5 bucks!)
Flour
Mixed Variety of Candy

Step One:
I learned this the hard way so I'm going to teach you the easy way!
First thing you're going to do is blow up your balloons to the size you want, i blew mine up to a little smaller than the size of my hand.

Step Two:
Next you're going to get a bowl or whatever you prefer, i actually used a half-tray catering foil tin!
Mix in 1 cup of liquid starch for every half-cup of flour, creating your mixture. Now if you purchased white string, you can now add in 3-4 drops to the shade you prefer, to the mixture and stir. I would do smaller amounts of the mixture so that none goes to waste and you get tons of colors!
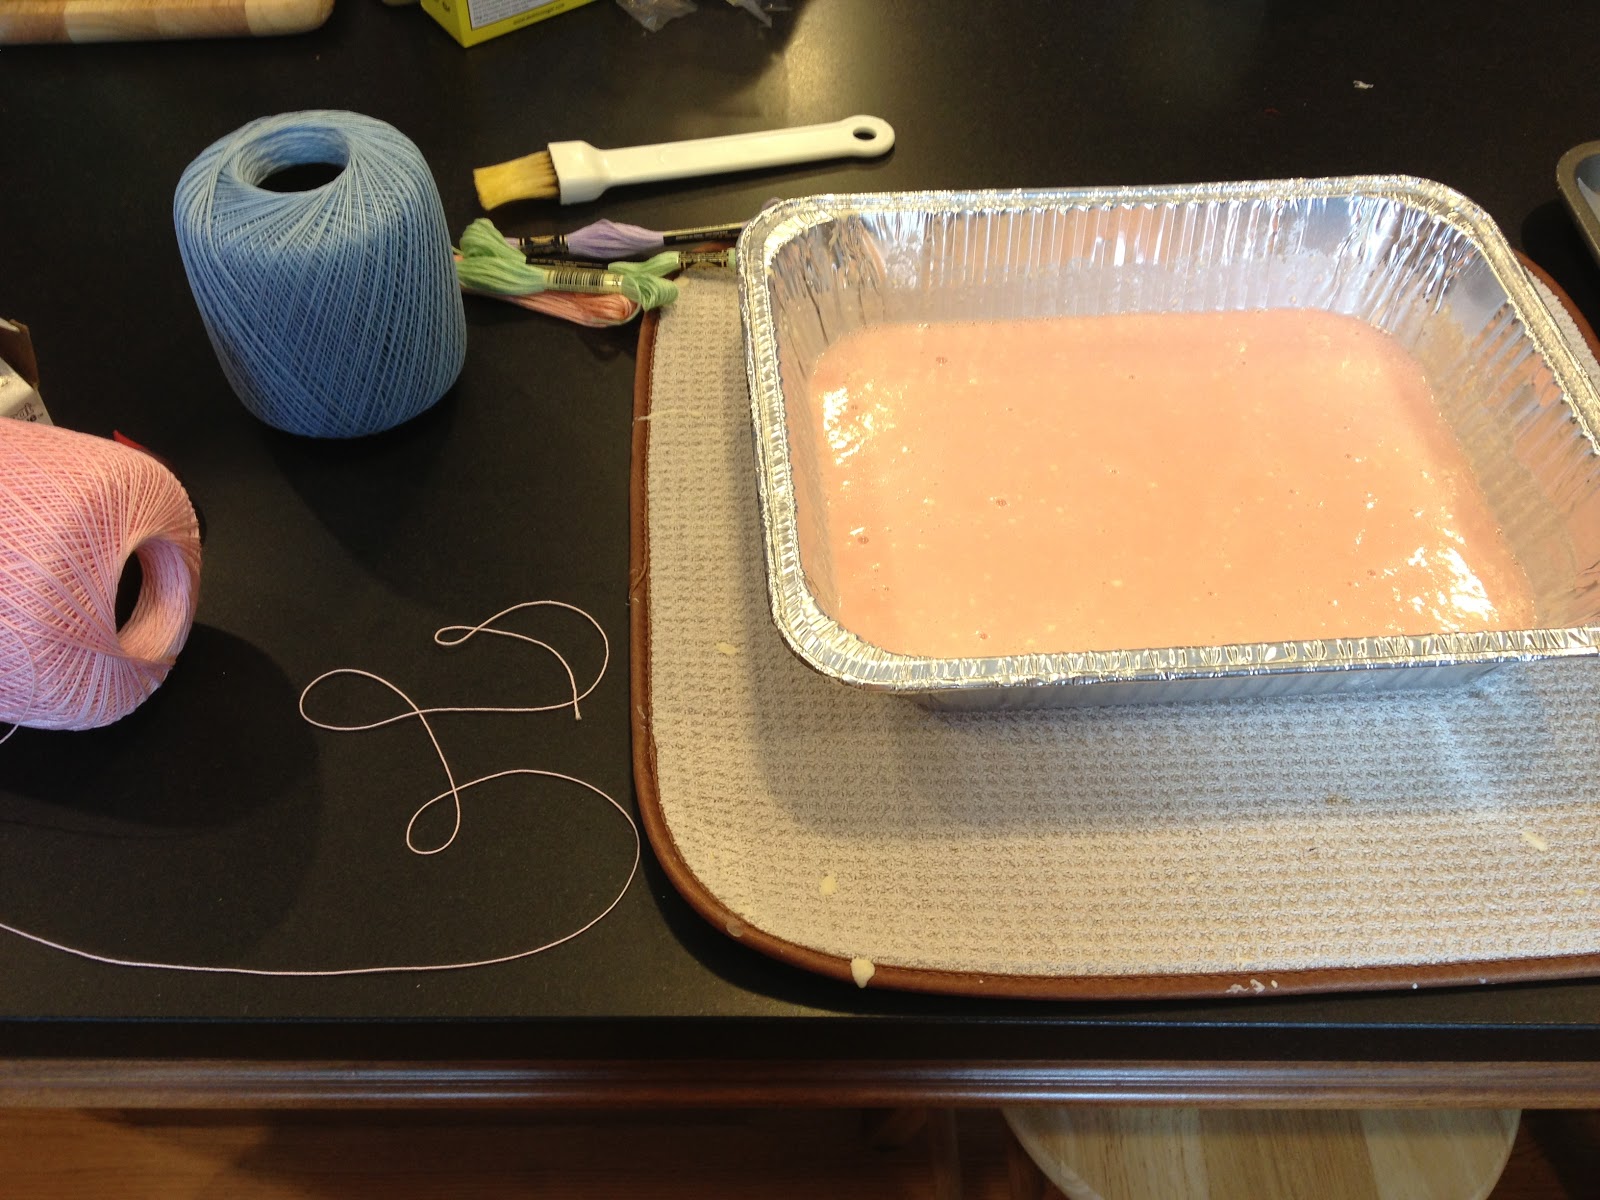
(This was the mixture without any food coloring, as you can see I used colored string, I will tell you though: *TIP* adding the food coloring definitely gave the finished product more of a bright color pop!)
Step Three:
Don't let your string get tangled! If you lay the string in the bowl/tray in a circular pattern it shouldn't tangle, but its hard to say it definitely won't because the starch makes it get sticky. If it tangles, no big deal, cut and keep on going!
Step Four:
Now you're going to place the string on the balloon, i usually start by the knot to keep it neat looking, and place my finger to hold it, while my other hand wraps the string around and around and around and around and around to form the "netting" look. Place on parchment paper or a tray, and allow several hours to dry. You want the string to be HARD so the more starchy mixture you get on it the better, keep that in mind!

Step Five:
When the string has completely hardened, (I let mine go overnight so i knew for sure) you're then going to take a sharp object, i used a knife, and pop the balloons right through the string openings, remove the deflated balloon, and toss it. Place each net to the side.
Step Six:
You're almost done!
Find the biggest opening in the net and shove some candy in there gently. If there is no opening big enough, simply take scissors and cut a string to create an opening!
In each "net egg" of mine, I did a treat size bag of mini m&m's or skittles, 2 mini kit-kat's, 1 mini snickers, and 2 mini reese's eggs, and that to me is the perfect amount of sweet on Easter.


PS. these baskets were 5 dollars at Walmart!
Enjoy! :)
XOXO
-Lo
DIY Easter Wreath How-To:

WHAT YOU WILL NEED:
Twig Wreath
(Michael's: $2.50)
Easter Eggs
(I got mine at a local dollar store 2 for $1.00, they come on wooden sticks)
Ribbon
Faux Flowers
(Michael's or a Dollar Store)
Optional: Wooden Bunny
(I found my little guy at a thrift shop for $1.69, you can use pretty much anything, an old decoration even, or something from a dollar store, be crafty!)
Step One:
Pull flowers off of each stem, and also take any loose pieces of twig or ones poking out the wrong way and break them off the wreath. Next you're going to layout your flower pattern in the places along the wreathe you're going to glue them. Once you've decided, heat up your hot glue gun. Using the hot glue gun, apply a drop or two of glue to the back of the flower as well as to the spot of the twig wreath where the flower will go, place and hold for a few seconds. Repeat this for each flower, remember to keep in mind where you're going to place the decorative eggs!
Step Two:
Using the same method with the glue gun, after removing the wooden stick from the eggs, glue each egg in the preferred spot.
Step three:
Purchase either an already made bow if you're not feel to artistically talented, if you are and know how to make a bow - you're awesome, if you don't follow this YouTube Video I used,
Step Four:
Attach a 3M Command Strip and Hook, to your front door or back door or wherever you may want to hang your wreath, and wait for the compliments, and you'll be able to brag and say you made it yourself. The glory of a DIY!
UP NEXT:
A traditional treat, that EVERYONE loves, with a little Easter twist on it!
Stay Tuned...
HAPPY EASTER!

XOXO,
-Lo
No comments:
Post a Comment